Our print profiles are built from a limited number of reference machines: BambuLab H2D for the BambuStudio range, Ultimaker S5 for Cura, and Raise3D Pro2 for IdeaMaker. It isn’t possible to test every printer on the market individually – this guide lets you import the right profile for your setup, or start from a reliable generic base if your equipment differs.
If you can’t import the profile because your printer or slicer differs from our reference machines, use the “Generic data” folder. It contains screenshots of settings that are ready to reproduce manually in your slicer.
This generic data may need adjusting for your machine. If you need help, contact us at contact@lattice-services.com.
How do you import into BambuStudio?
In this scenario, the material configuration must be imported first. It’s located in the “Material profile to import” folder and contains the filament settings (nozzle temperature, cooling, bed temperature, etc.) for the entire BambuLab printer range.
Import the material configuration
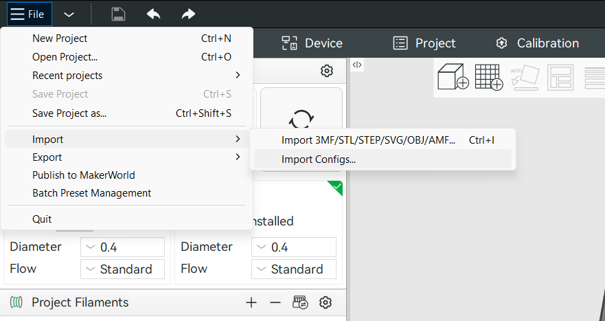
Menu File → Import → Import Configs, select your configuration file, then confirm “Yes to all”. Once imported, the material stays available until you delete it yourself.
When the folder only shows “USE GENERIC”
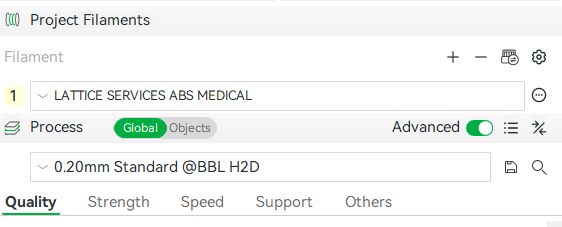
For certain BambuLab profiles, the “Print profile” folder contains only a subfolder named “USE GENERIC [DIAMETER] @BBL [Printer name]”. This means that, in this case, the material doesn’t require any special adjustment to the speeds and the slicer’s standard profile is fine. The process has two steps: first import the material configuration (temperature, flow, cooling, etc.), then use the standard profile provided by BambuLab.
Example: for an H2D, import the material, then select the BambuLab profile “0.20mm Standard @BBL H2D” – this is the only profile our team has validated. Of course, feel free to adjust and optimize it based on your needs (number of walls, infill, speeds, etc.).

Otherwise, if your material does require a dedicated profile, continue the import in BambuStudio:
Open the 3MF project matching your printer
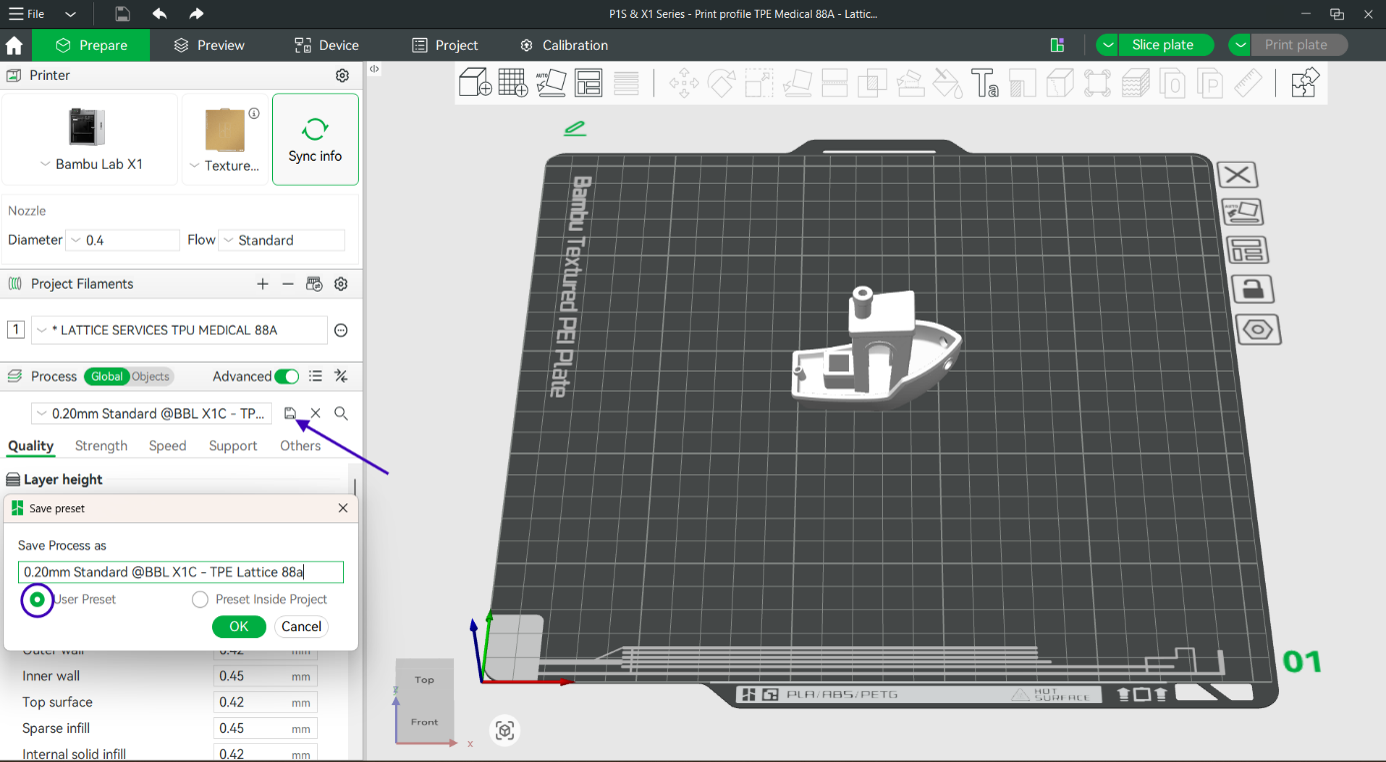
Open the 3MF file matching your printer’s name with BambuStudio. The project opens with a test Benchy – it can be deleted, it won’t be used.
Save as a user preset
Before going further, click the save icon and save the profile as a “User preset”, under whatever name you like. It will then be available in all your future projects without having to repeat the process.
How do you import into the Cura slicer?
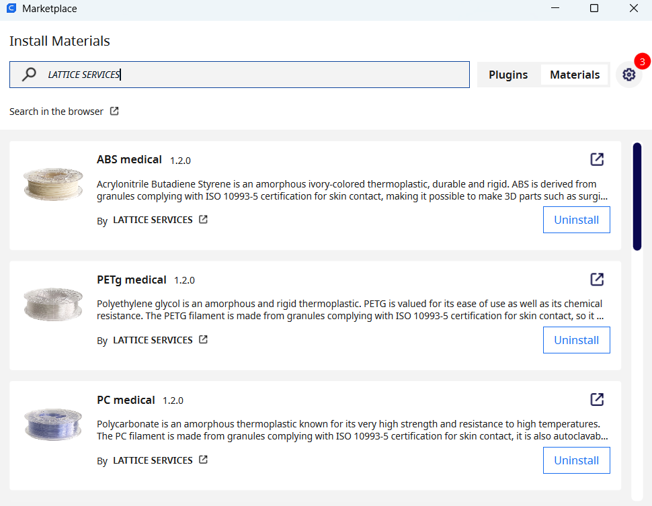
Open the Marketplace
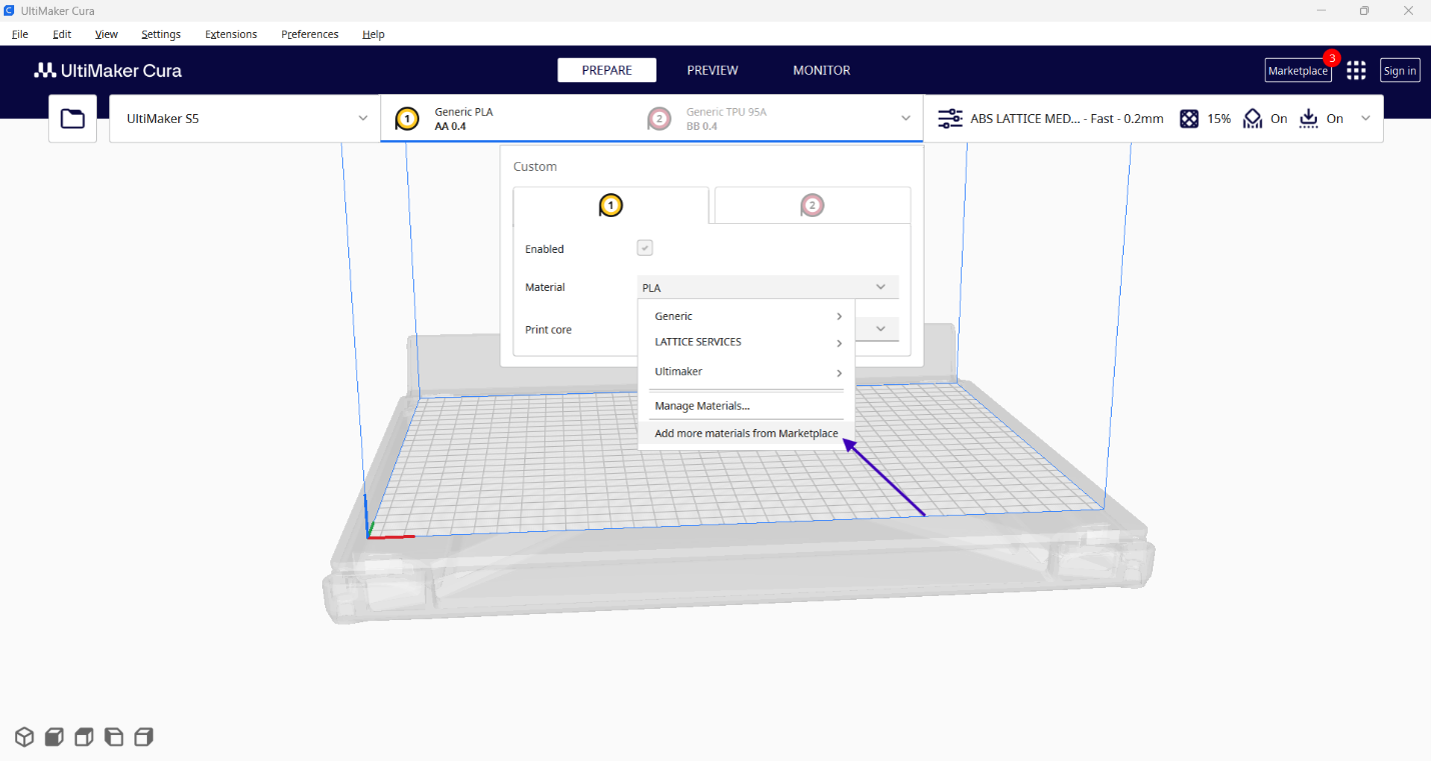
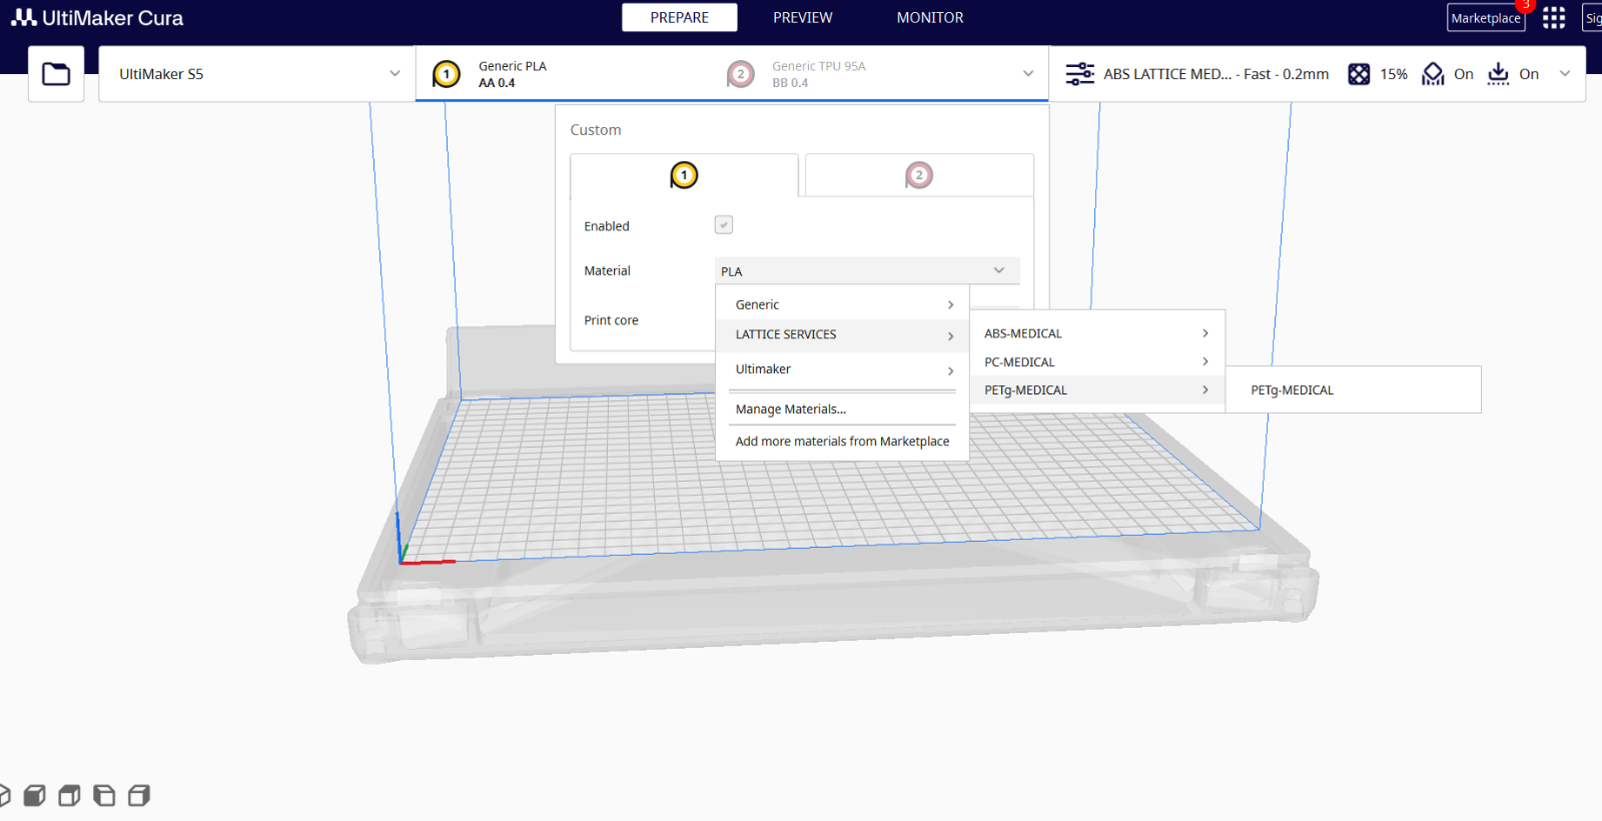
In the material selector, click “Add more materials from Marketplace”.
Search for “LATTICE SERVICES”
In the window that opens, search for “LATTICE SERVICES”, then click “Install”. Cura may restart automatically.
Find the material
Once installed, the material is ready to slice with and can be found in the “LATTICE SERVICES” section of the material selector.
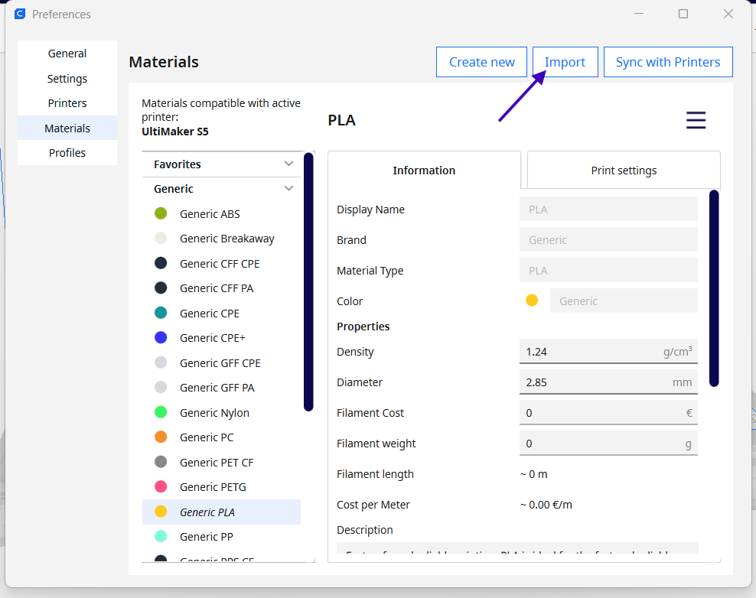
Manual import is possible: in the material selector, click “Manage materials” → “Import”, then select the print profile in the “Ultimaker” folder.
How do you import into IdeaMaker?
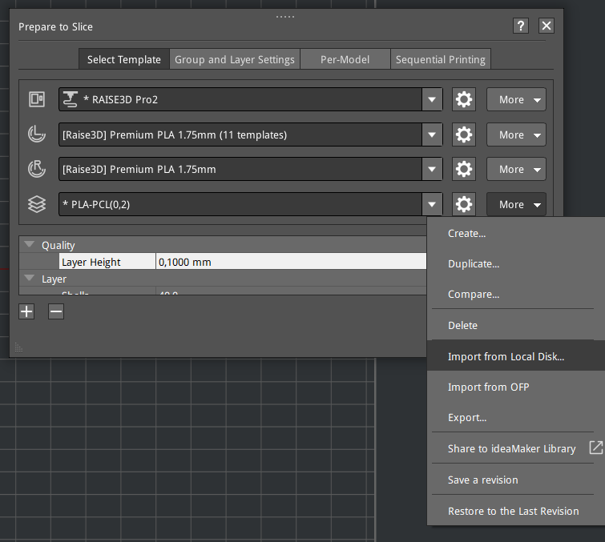
Open your slicer. In the “Prepare to Slice” section, on the material selection tab (template), click “More” → “Import from local disk”, then select the print profile in the “RAISE3D PRO2” folder.
One profile per slicer, one reference machine
| Slicer | Reference printer | Profile folder |
|---|---|---|
| BambuStudio | Reference printerBambuLab H2D | Profile folderFolder named after the printer |
| Cura | Reference printerUltimaker S5 | Profile folder“Ultimaker” or Marketplace |
| IdeaMaker | Reference printerRaise3D Pro2 | Profile folder“RAISE3D PRO2” |
You’re ready to print
Once the profile is imported and saved as a preset, it stays available in all your future projects. In summary:
- import the material configuration before the print profile
- check the exact name of your printer in the folder provided
- if there’s no match, start from a generic “Low Speed” or “High Speed” profile
- always save as a user preset so you don’t have to repeat the process